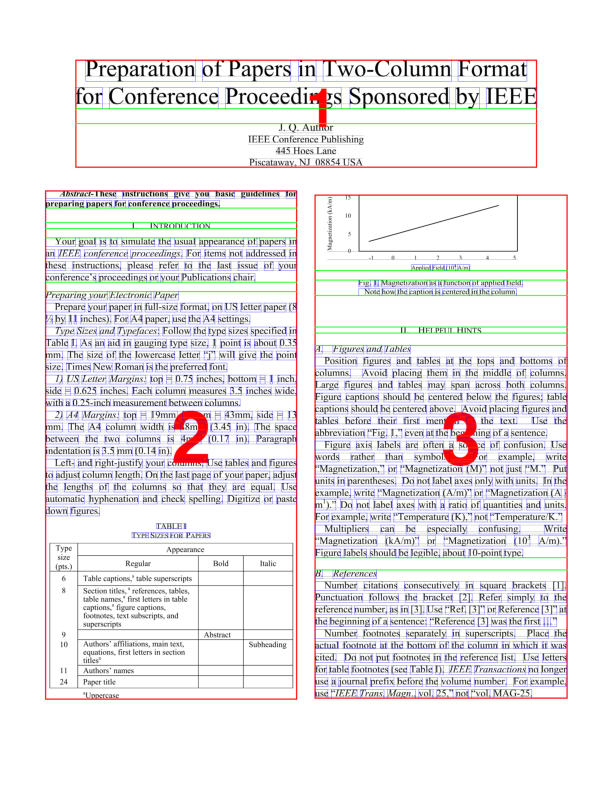
Willus.com Home   |   Archive   |   About  

Willus.com's K2pdfopt Help Page

Return to K2pdfopt Home Page

MENU
Getting Started:
    1. Windows
  Text Menu
  (now with video!)
  2. Linux
  Ubuntu
  Env vars
  3. Mac OSX
  4. k2pdfopt Guide (WIP)
  5. Help in other languages

FAQ | Forum

Customizing K2PDFOPT:
    1. K2pdfopt GUIs
    2. Disabling the Windows GUI
    3. The interactive menu
    4. List of command-line options
    5. Using a shortcut
  (now with video!)
  6. Using the K2PDFOPT environment variable
  7. Using the command line

Adjusting the output:
    1. Screen Size
    2. Increasing the magnification
    3. Landscape mode
    4. Output File Size
    5. Setting Margins
    6. Color Output
    7. Uneven Line Breaks/ Excess Margins

Processing Options:
    1. Showing Markings
    2. OCR
    3. Native PDF
  (now with video!)
    4. Auto-Straightening
    5. Ignoring Borders/ Headers/Footers
    6. Detecting Columns
    7. Protecting Regions
    8. Column Order
    9. Right-to-Left Page Scanning
    10. Using Ghostscript
 
  SHOWING MARKINGS
As of v1.35, k2pdfopt has a nice debugging option to clearly show you how it is interpreting your PDF file by marking the regions on it in the order it chooses to display them. The command-line option -sm (show markings) does this, or you can select "sm" from the interactive menu. This will generate a file name ending in "_marked.pdf". For example, if you process a file called mydoc.pdf, the markings will be shown in the file mydoc_marked.pdf. An example of the marked output is shown below for the IEEE two-column template.

   
Marked File (-sm -odpi 250)

   
..._k2opt file

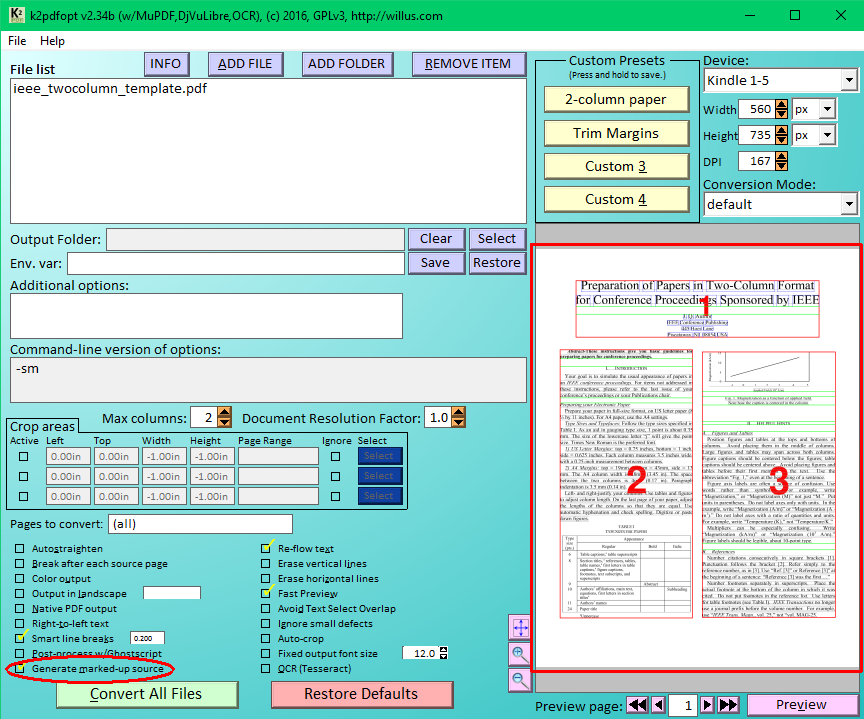
Windows GUI checkbox for previewing k2pdfopt markups. If the "Generate marked-up source" box is checked, the preview window will show the marked-up source pages, otherwise it will show the output (converted) pages.


This page last modified
Sunday, 12-Feb-2023 12:43:23 MST