| |
CUSTOMIZING K2PDFOPT USING A SHORTCUT
Windows users, watch the video or see the instructions below.
Mac users, see step 5 of the
Mac install instructions. Linux users, see
the Linux install instructions.
CUSTOMIZING K2PDFOPT VIDEO
|
Rather than select settings from a menu each time you run k2pdfopt, if you have
settings you want to use each time, or if you don't want to be prompted with a menu,
you can specify the settings as command-line arguments as shown below.
- Create a shortcut icon by right-clicking on the program icon and selecting
"Create Shortcut."
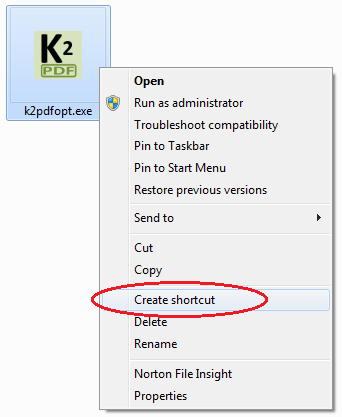
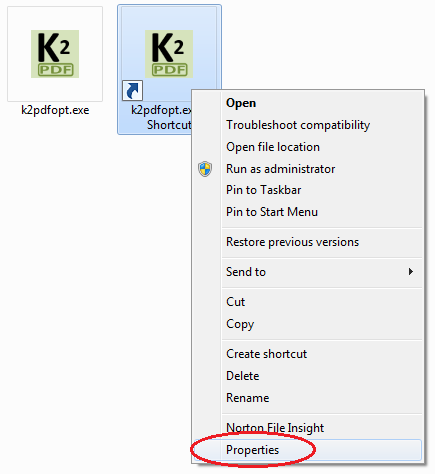
- Right-click the new shortcut icon and select "Properties".
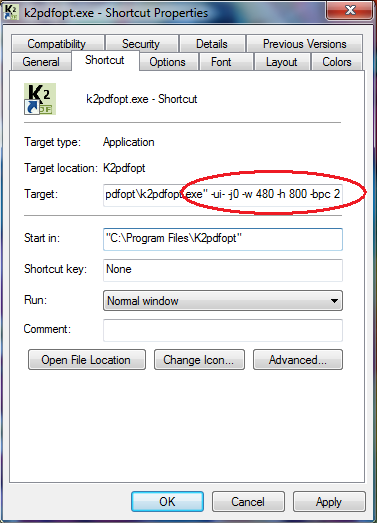
- Where it says "Target:", append
your customized command line
options.
For example, appending -ui- -j 0 -w 480 -h 800 -bpc 2
will run k2pdfopt with no prompting (-ui-), left-justified text (-j 0), an output screen resolution
of 480 x 800, and using 4-level grayscale output (-bpc 2). Be sure to put
a space between the name of the program and your command line options as shown
in the example below (and if the program name ends in a double-quote, as also shown below, put your
options after the double-quote).
- Click "OK".
- Re-name the shortcut as you wish.
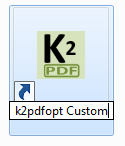
-
Now you can drop your PDF files onto your new re-named shortcut icon and k2pdfopt will run with the customized settings.
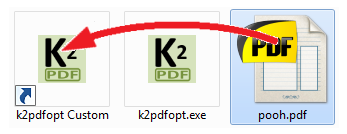
This is a good way to create specific icons for different types of
conversions.
Some examples of command-line customized settings:
-odpi 250
(Magnified output--see DPI settings.)
-idpi 400 -w 640 -h 960 -odpi 326
(Output for the iphone 4 at full 640x960 resolution)
You can see a list of all command-line options here.
|
|
|